
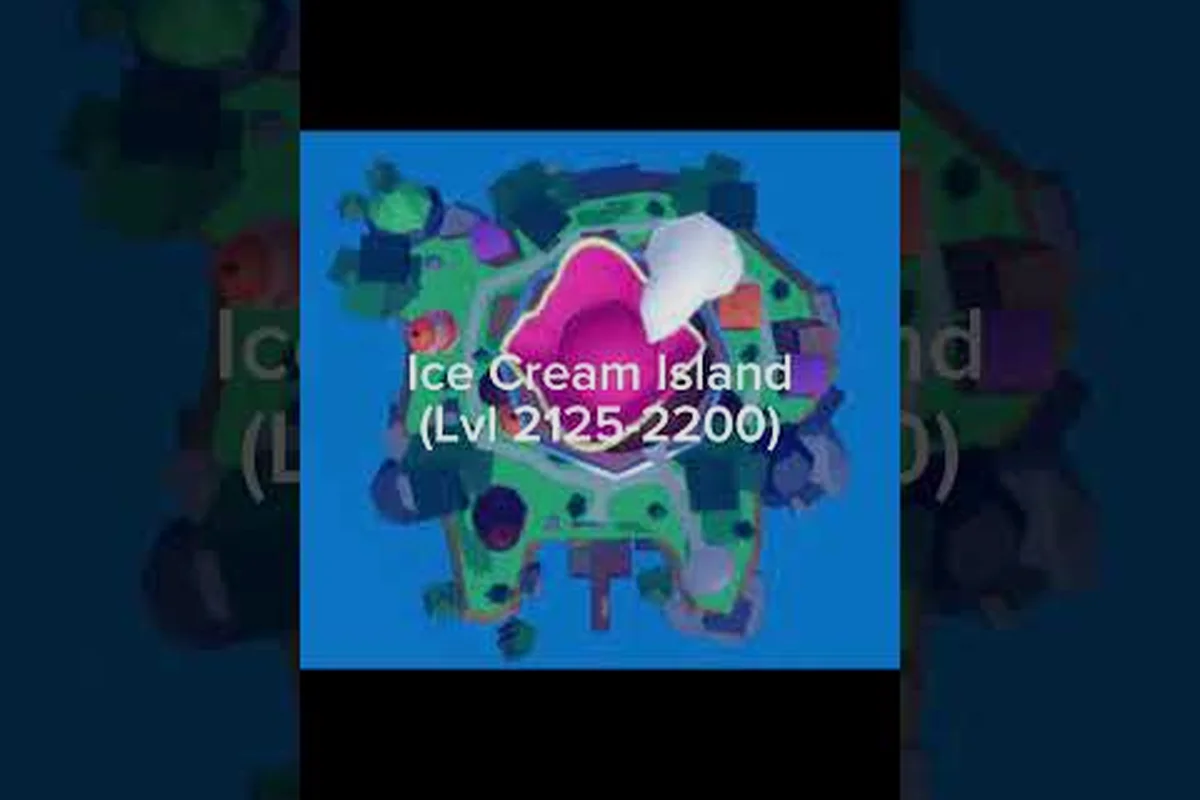
Blox Fruits third sea islands can overwhelm players because each destination adds a tighter level range, tougher enemies, and new quest requirements. This route breaks the journey into practical stops from Port Town through Tiki Outpost, showing what to clear before moving on.
Third Sea Island Levels, One by One
The third sea begins around level 1,500, but entering the region is only the first step. Every island has a recommended level band, and moving ahead before meeting those gates usually turns exploration into a long battle against enemies that deal excessive damage.
| Destination | Recommended level | Main purpose | Route position |
|---|---|---|---|
| Port Town | 1,500 | Third-sea entry, quests, basic enemies | First |
| Hydra Island | 1,600 | Mid-level quests and boss preparation | Second |
| Great Tree | 1,700 | Combat quests and stronger mobs | Third |
| Floating Turtle | 1,800 | Side quests and regional exploration | Fourth |
| Haunted Castle | 1,900 | Advanced enemies and boss battles | Fifth |
| Sea of Treats | 2,100 | Faster leveling and repeatable quests | Optional |
| Tiki Outpost | 2,300 | Late-third-sea quests and enemies | Final |
| Submerged Island | 2,600 | Endgame content and secret exploration | Endgame |
Community island data places the early third-sea route around Port Town at level 1,500, with later destinations extending toward Submerged Island near level 2,600. These figures function as practical benchmarks rather than absolute walls, because a strong build can defeat slightly higher-level enemies, but the margins become unfavorable as the gap widens.
Recommended power thresholds
Your weapon level matters as much as your character level. A level 1,550 character with an underleveled weapon may struggle where a similarly ranked player with stronger gear clears enemies comfortably. Keep your best weapon equipped, check whether the enhancement is actually active, and avoid arriving with an empty energy bar.
| Progression point | Character target | Gear target | Practical objective |
|---|---|---|---|
| Port Town entry | Level 1,500 | Best available enhancement | Complete introductory quests |
| Hydra Island | Level 1,600 | Stable against level 1,600 enemies | Build mastery and unlock the next route |
| Great Tree | Level 1,700 | Reliable burst or crowd control | Clear advanced story encounters |
| Floating Turtle | Level 1,800 | Enough sustain for mixed fights | Gather quest progress and resources |
| Haunted Castle | Level 1,900 | Strong single-target damage | Prepare for boss attempts |
| Tiki Outpost | Level 2,300 | High-level enhancement | Complete late third-sea objectives |
Players entering the third sea underleveled often report that enemies remain alive for too long and can remove most of their health in a few hits. That experience supports a simple rule: level 1,500 is the entry point, not the point at which the entire third sea becomes easy.
Route order and unlocks
Use Port Town as the foundation. Complete its NPC quest chain, gather the required materials, and defeat the requested enemies before choosing a fast-travel point. The next area becomes much easier when you enter with completed objectives, enough experience, and a little extra spending money.
The route continues from Hydra Island to Great Tree, Floating Turtle, and Haunted Castle. Sea of Treats sits outside the strict linear path because it works best as a leveling stop. Tiki Outpost follows the later portion of the journey, while Submerged Island functions as the endpoint for players who continue to the highest-level content.
The complete island reference for Blox Fruits is useful for comparing first-, second-, and third-sea destinations without confusing them with earlier zones. It can also clarify unlock order and enemy levels—for example, where the route transitions from Second Sea islands into the third-sea progression leading toward Submerged Island. Checking each island’s location, recommended level, and available activities helps prevent accidental travel to a higher-level destination before its quest requirements are completed.
Getting Ready Through the Second Sea
The third sea is not accessible from the starting map. Players must finish the first sea, unlock the second sea, complete its quest requirements, and then use the appropriate NPC. Preparing each stage prevents a common failure: reaching the final doorway with missing quests, weak equipment, or too little experience.
Starting with the first-sea islands
The Blox Fruits starter island introduces movement, combat, NPCs, vendors, and the first quest chain. Completing it teaches the core quest loop before you move toward the Blox Fruits jungle island, Blox Fruits pirate village, and Blox Fruits desert island.
| First-sea stop | Main function | What to finish before leaving |
|---|---|---|
| Blox Fruits starter island | Basic quests, vendors, and controls | Introductory NPCs and early quests |
| Blox Fruits jungle island | Combat and creature hunts | Local quest requirements |
| Blox Fruits pirate village | Mid-island enemies and rewards | Regional quests and gathering objectives |
| Blox Fruits desert island | Later first-sea progression | Quests needed for the next access step |
Treat these islands as a tutorial sequence rather than optional scenery. Each one supplies experience, Beli, items, and mastery needed for later combat. Skipping them creates a weak foundation because early weapons and fighting habits may still be unfinished when the second sea introduces stronger opponents.
Reaching the second sea
The process of learning how to get to the second sea begins after the necessary first-sea quests are complete. Return to the quest giver, finish the remaining objectives, and interact with the NPC who provides the access prompt. Community reports emphasize completing the full chain instead of rushing directly to the doorway.
| Preparation step | Why it matters | Result |
|---|---|---|
| Finish starter-island quests | Teaches the quest interface | First quest rewards and experience |
| Clear jungle objectives | Builds early combat experience | Stronger starting position |
| Complete pirate-village quests | Supplies Beli and materials | Better equipment purchases |
| Finish desert objectives | Meets the first-sea exit chain | Access to the second-sea transition |
| Reach the required level | Supports tougher enemies | Smoother second-sea progression |
When learning how to get to the second sea, check the quest giver’s current request because level requirements and objective order can change through updates. The route also depends on finishing the main questline rather than merely sailing from one island to another.
Preparing for the third sea
The third-sea transition comes after second-sea progression, additional quests, and a level 1,500 character requirement. Once eligible, speak with the appropriate NPC in the second sea to begin the crossing to Port Town. This is the final gate before the route covered in this guide.
Do not delay weapon enhancement until Port Town. Spend accumulated Beli before crossing, equip your strongest weapon, and carry enough supplies for several failed fights. A short trip to a shop can be more valuable than another ordinary quest because better damage shortens every subsequent encounter.
The third-sea leveling plan can bridge lower-level gaps once Port Town is available by organizing repeatable fights around enemies that suit your current damage and health. For example, a player who cannot defeat a stronger Sea Beast reliably should first clear weaker mobs for XP, then return once weapon damage or Mastery raises the hit count; this prevents low-level losses from interrupting the route through the third sea islands.
Port Town and Hydra Island: Building Momentum
Port Town serves as the third sea’s entry hub, so the best approach is to use it for preparation rather than rushing through every visible NPC. Identify the active quest giver, collect local requirements, and learn where the fast-travel network reaches before attempting tougher destinations.
Port Town first objectives
Begin with the local quest chain and remove low-level enemies around the town. These fights award experience and establish the damage output of your current build. They also reveal whether your weapon is properly enhanced, because a weak weapon tends to make even introductory enemies feel more dangerous.
Port Town Preparation Checklist
-
Reach at least level 1,500 before treating the area as a regular grinding location.
-
Complete every active quest that can be finished with enemies visible in town.
-
Gather quest drops before spending Beli, since inventory space can become limited.
-
Visit the weapon dealer and train the damage and mastery slots available at this stage.
-
Learn the fast-travel routes to Hydra Island and Great Tree.
-
Keep a recovery option ready if your health drops during repeated fights.
Players sometimes mistake Port Town’s moderate difficulty for an indication that all third-sea islands are similarly accessible. The route becomes harder quickly, and enemies designed for the 1,600–1,700 range can overpower an unprepared player even though Port Town itself feels calm.
Hydra Island progression
Hydra Island introduces a more serious level band, making it the first meaningful test of your equipment and combat knowledge. Complete its NPC quests in order, defeat the required enemies, and use repeatable encounters only after the story objectives are finished.
| Activity | Port Town | Hydra Island | Why the change matters |
|---|---|---|---|
| Typical level band | Around 1,500 | Around 1,600 | Enemy damage and health increase |
| Main activity | Initial third-sea quests | Mid-level story quests | Quest targets become tougher |
| Best preparation | Learn local routes | Improve weapons and mastery | Shorter, safer fights |
| Exit goal | Open the next routes | Prepare for Great Tree | Preserve experience for the next stop |
The community video All Sea 3 Islands in Blox Fruits provides a visual route reference for the island sequence. Use it to understand the geography, but confirm every level gate against the current quest interface before traveling.
Great Tree, Floating Turtle, and Haunted Castle
These middle islands form the core of the third-sea progression. Each introduces a distinct challenge: Great Tree emphasizes direct combat, Floating Turtle broadens exploration and side objectives, and Haunted Castle raises the danger with advanced enemies and boss encounters.
Great Tree combat focus
Great Tree is most useful when your build has enough burst damage to remove priority targets quickly. Identify the most dangerous enemy type, draw its attention away from dangerous ground effects, and keep moving while your attacks connect. Fighting in small groups is often more effective than standing in one location.
Great Tree Route Signals
-
Reach the recommended level before accepting the toughest quests.
-
Carry healing items for longer encounters rather than relying on one recovery.
-
Enhance the weapon before testing new enemy groups.
-
Practice the game’s dodge mechanic against stronger attacks.
-
Collect boss-related drops even when the encounter itself fails.
Floating Turtle exploration
Floating Turtle mixes regional movement with combat encounters, making it easy to lose time if you explore without a checklist. Identify the active NPC, collect each requested item, and mark the remaining enemy targets before moving between distant parts of the island.
Because some destinations require travel across multiple sea events, patience is more valuable than speed. The community footage referenced above shows that this region connects several third-sea activities, but it also demonstrates why players should allow extra time for encounters that do not appear on a static route map.
Haunted Castle escalation
Haunted Castle is a natural checkpoint before the late-level destinations. Its stronger enemies are useful for testing builds because they expose weak points in stamina management, cooldown timing, and target selection. Arrive near level 1,900 with improved gear rather than relying on level alone.
Boss attempts should follow quest preparation. If a quest requires a specific elite or boss, check its spawn conditions and recommended level first. The Blox Fruits boss guide outlines where major enemies appear and how to prepare for their rewards.
| Island | Core challenge | Recommended preparation | Next destination |
|---|---|---|---|
| Great Tree | Sustained combat against stronger mobs | Enhanced weapon and mastery | Floating Turtle |
| Floating Turtle | Travel-intensive quests and mixed encounters | Inventory space and healing supplies | Haunted Castle |
| Haunted Castle | High-damage enemies and boss checks | Near-max health and reliable burst | Tiki Outpost or Sea of Treats |
Sea of Treats and Tiki Outpost Route Options
The final third-sea route splits into a leveling branch and a late-content branch. Sea of Treats can help close an experience gap, while Tiki Outpost is the better destination when you already meet the required level and need to continue its quest chain.
Choosing Sea of Treats
Sea of Treats is useful for players who are close to the next level band but not quite ready for the enemies at Tiki Outpost. Select repeatable quests with simple objectives, avoid routes that require excessive travel, and evaluate progress after each full quest rather than after every individual kill.
| Player situation | Better choice | Reason |
|---|---|---|
| Below the Tiki Outpost level target | Sea of Treats | Easier repeatable battles |
| Need quest-specific materials | Both, depending on the request | Material gathering may override leveling |
| Weapon damage feels weak | Sea of Treats | Faster kills can improve time efficiency |
| Already above the level target | Tiki Outpost | Avoid unnecessary detours |
Community reports describe Sea of Treats as one of the more efficient third-sea leveling locations. However, no location eliminates the need to match enemies to your build, and a supposedly easy quest can take longer if its targets are spread across the map.
Tiki Outpost preparation
Tiki Outpost is the intended destination for players moving toward the late third sea. Complete its introductory objectives, then compare the required level with your current rank. If you are well above the target, focus on quests and materials; if you are only slightly below it, finish a short leveling session before entering. The Submerged Island guide explains the next destination and its exploration requirements. It is useful for planning beyond Tiki Outpost, but arriving at Submerged Island without completing the route between the two areas can leave important progression unfinished.
Submerged Island as the endpoint
Submerged Island sits near level 2,600 in community progression data and represents the far end of the standard third sea. Its higher level target means that excellent weapons, strong mastery, and a stable combo pattern matter more than simply crossing the minimum requirement.
Plan the approach in stages: first finish the Tiki Outpost main quest requests, then compare your current level with Submerged Island’s roughly level 2,600 target, and finally prepare an upgraded weapon, quest materials, and inventory space. The endpoint is not simply entering the third sea; it is reaching a stable progression route where weapon mastery and combo execution reduce the difficulty of higher-level enemies.
-
Complete Tiki Outpost’s main quest requests.
-
Reach the recommended level for Submerged Island.
-
Enhance your best weapon and verify the equipped weapon’s stats.
-
Collect quest materials from multiple regions because one location may not contain every item.
-
Enter the island with recovery supplies and enough inventory space.
This route turns the third sea into a level-by-level progression chain, rather than a checklist of unrelated destinations. For example, a player can clear the Tiki Outpost quest chain, use its rewards to improve the equipped weapon, and then move toward Submerged Island’s roughly level 2,600 target. That sequence matters because enemy difficulty scales with the player’s level and combat power; arriving under-geared can turn a controlled boss attempt into a reset or defeat. Each island should therefore be treated as a preparation checkpoint, with quest progress, weapon mastery, combo stability, and remaining supplies reviewed before the next destination is attempted.
Efficient Third Sea Quest and Farming Plan
A clear route saves travel, but efficient farming determines how quickly you can finish it. Prioritize the quest that unlocks your next sea access or gives mastery XP, then spend remaining time on money farming and material gathering so upgrades do not stall. For example, complete the Third Sea story objectives while collecting quest-specific drops, switch to the best available enemy for money and XP, and reserve rare materials for the next boss or weapon upgrade instead of spending them immediately.
Prioritize objectives by value
Start with story quests that unlock fast travel or new islands. They reduce travel across the entire third sea, so their practical value exceeds the immediate Beli reward. After unlocking the next route, return to repeatable quests that fit your current level.
| Objective type | Immediate benefit | Long-term value | Best timing |
|---|---|---|---|
| Main quest | Experience and Beli | New routes or story access | First |
| NPC quest | Experience and materials | Builds mastery | Early on each island |
| Repeatable quest | Beli and experience | Supports shopping | Between story blocks |
| Boss hunt | Rare rewards and access | Stronger gear progression | When build is ready |
| Material gathering | Quest items | Unlocks crafting and upgrades | Along planned routes |
Plan around bottlenecks
The most common bottleneck is money. Quest rewards may fund only one weapon enhancement before you run dry, especially after repeated boss failures. Use repeatable quests in Sea of Treats or the current island instead of collecting every possible reward out of order.
Inventory planning becomes a bottleneck when quest rewards and boss drops compete for the same slots or currency. After clearing the Sea of Treats objectives, check the required item count before farming materials, because extra loot can fill your inventory and prevent you from claiming the final reward. For example, secure the quest’s needed materials first, then use remaining capacity for boss drops and weapon enhancement materials, saving enough space to travel back to the quest giver and complete the turn-in.
Mastery is best improved through varied combat. Repeatedly attacking one weak enemy can raise a stat quickly, yet it will not prepare you for later mobs with different movement patterns. Rotate between nearby enemy types after finishing a quest block.
Three-phase session structure
A practical session has three phases. First, complete the active story or NPC quests to unlock a new destination. Second, spend the resulting Beli and improve the weapon before testing harder enemies. Third, farm only until the next level threshold, then move to the next island.
| Phase | Main action | Equipment decision | Exit condition |
|---|---|---|---|
| Story block | Complete route-critical quests | Keep the current best weapon | New route unlocked |
| Upgrade block | Earn and spend Beli | Enhance the main weapon | Damage feels reliable |
| Leveling block | Complete repeatable quests | Rotate weapons for mastery | Next level reached |
This structure also reduces frustration in the Blox Fruits third sea islands. Instead of entering Haunted Castle with an underpowered setup and repeatedly losing to enemies such as the Cocoa Bomber, use repeatable quests to earn Beli, upgrade your weapon, and improve mastery with an alternate weapon. Return to Haunted Castle only after your damage and survivability feel reliable; for example, clearing the Story block first can unlock routes that were previously inaccessible, while the Upgrade block addresses the weapon gap that caused earlier defeats.
Frequently Asked Questions
Can you enter Blox Fruits third sea islands before reaching level 1,500?
No. Reaching level 1,500 is the main progression gate for entering the third sea, and the route normally begins at Port Town. Completing the second-sea quest chain is also important, because the transition NPC and related objectives must be finished before the new region becomes available.
Which third-sea island should a new player visit first?
Port Town is the correct starting point because it introduces local quests and connects to the early third-sea route. Move toward Hydra Island and Great Tree after meeting their level targets, rather than jumping directly to Haunted Castle or Tiki Outpost.
Is Sea of Treats necessary before Tiki Outpost?
Not always. If your level and equipment already fit Tiki Outpost, continuing the main route is more efficient. Sea of Treats becomes valuable when you need a small amount of experience, extra Beli, or easier repeatable fights before facing late third-sea enemies.
Do Blox Fruits third sea islands require specific weapons or builds?
No single weapon is required, but every build benefits from clear damage output, adequate stamina, and mastery. Sword, gun, fruit, and other viable weapons can work if their enhanced stats match the enemies you face; level alone cannot compensate for weak equipment.
Should I complete the first-sea starter, jungle, pirate, and desert quests?
Yes. Those islands teach the quest system, award foundational gear and Beli, and prepare the account for the later level gates. Finishing the Blox Fruits starter island, Blox Fruits jungle island, Blox Fruits pirate village, and Blox Fruits desert island creates a stronger foundation before the second- and third-sea transitions.
The complete Blox Fruits third sea islands route works best when treated as a progression chain: prepare through the first and second seas, enter Port Town at level 1,500, clear each area in order, and improve your gear before the next level band. From Hydra Island through Tiki Outpost, consistent quests and appropriate leveling prevent the route from becoming a punishing series of disconnected fights.