
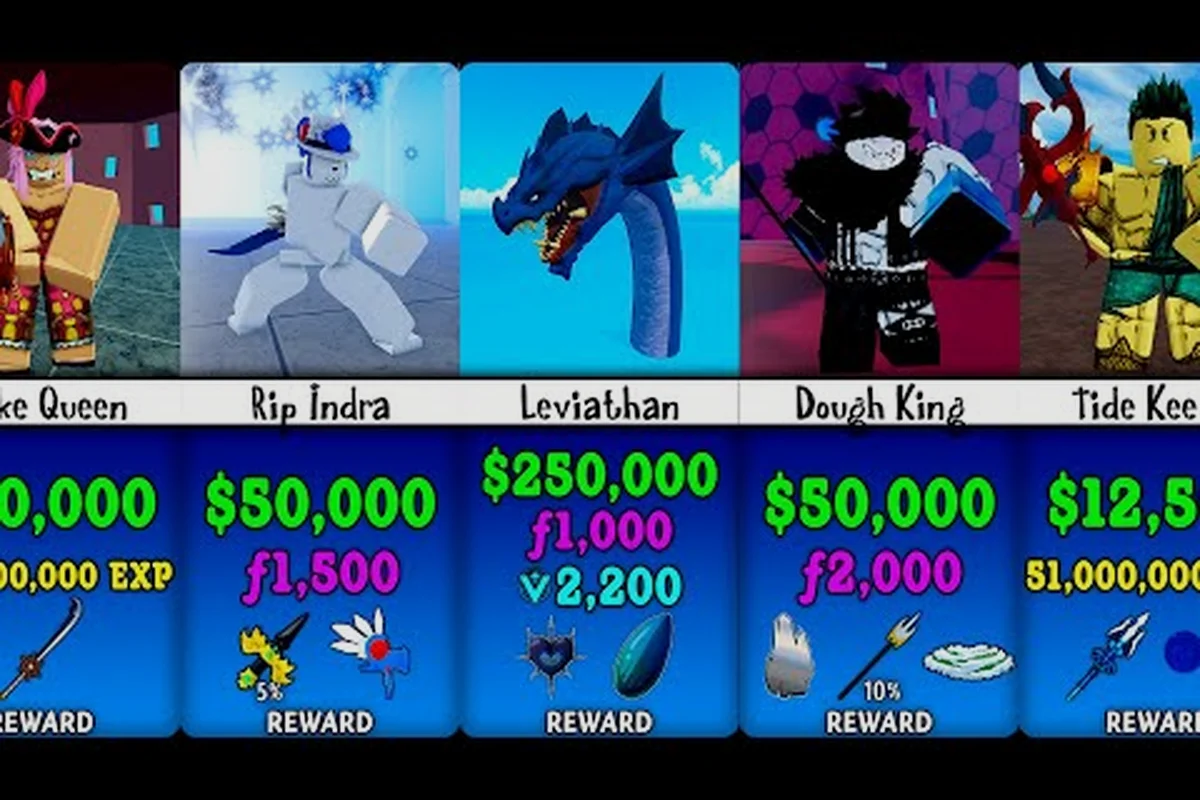
Blox Fruits raid boss drops determine how quickly you can afford awakening, race rerolls, and Blox Fruits Race V4. The important number is the Fragment yield, because Fragments are the main upgrade currency shared by these progression paths, not merely a rare-item reward.
What Blox Fruits Raid Boss Drops Actually Reward
Raid bosses are primarily a Fragment source in Blox Fruits. Unlike ordinary world bosses, they do not normally provide accessories as their principal reward, so players evaluating Blox Fruits raid boss drops should compare Fragment income, clear speed, access, and repeatability rather than waiting for a rare accessory.
That distinction changes the value of each raid. A slightly lower reward can still be the better farm when it has a short route, generous Fragments, or a short cooldown. By contrast, a demanding raid with a long respawn or complicated preparation is less efficient when its Fragment payout does not justify the extra time.
| Raid reward type | Main purpose | How to value it | Typical farming priority |
|---|---|---|---|
| Fragments | Awakening, race rerolls, and Race V4 | Compare the amount awarded per successful clear | Very high |
| Awakening access | Unlock or progress an awakened form | Pair the raid with the fruit being awakened | High |
| Race progress | Obtain Blox Fruits Race V4 or improve its rolls | Count usable rolls after each clear | Goal-dependent |
| Accessories | Gear improvement | Treat separately from Fragment farming | Secondary for raids |
| Temporary combat advantage | Easier clear or safer run | Value only if it reduces lost time | Supportive |
Community videos such as Blox Fruits All Bosses & Raid Bosses Rewards reinforce this loot pattern by showing raid bosses clustered around Fragments, Awakening materials, and Race V4 progress instead of accessory chests. For example, a raid that awards useful Fragments every few minutes can outperform a slower boss with a larger one-time payout, because repeated Fragment income advances race rerolls and awakening goals. The key is to measure Fragments per minute, clear time, respawn delay, and entry requirements rather than assuming every Blox Fruits raid boss drop includes a permanent accessory.
Fragments, Accessories, and Progression Value
Fragments are the clearest numerical benchmark because they feed several long-term goals. Their practical worth depends on your next destination: Awakening value rises when the fragments go toward your main combat fruit, while Race V4 value increases when every clear brings you closer to the required total or replaces a weak roll.
Accessories require a separate comparison against the standard boss loot pool. If a raid takes longer than several regular boss runs but produces only Fragments, farming it for gear alone is inefficient. The broader Blox Fruits boss list can help compare regular bosses with raid targets from a time-and-reward perspective.
Reward Tiers by Farming Goal
The same raid can rank differently depending on the objective. A reliable beginner raid may offer excellent early-game value but become unnecessary after awakening. A tougher late-game raid may remain worthwhile when you need a large Fragment deficit, especially if its clear speed remains competitive.
| Current goal | Best reward metric | Preferred raid profile | Common mistake |
|---|---|---|---|
| Beginning a fruit awakening | Fragment gain and entry cost | Low setup cost, repeatable clears | Saving every Fragment without progressing |
| Completing Race V4 | Progress toward total and reroll quality | Reliable, high-volume runs | Rerolling before the build is ready |
| Replacing a bad race | Expected value per reroll | Fast clears and affordable access | Farming the same roll repeatedly |
| Raising personal Fragment total | Net gain after chip cost | High yield and short cooldown | Ignoring repeat-run access |
| Preparing for endgame content | Consistency and team strength | Coordinated team clear | Relying on a difficult solo run |
This framework prevents the common mistake of treating Fragment amount as the only ranking factor, because a Blox Fruits raid’s practical value also depends on clear time, Fragment chip costs, and the raid boss’s reset or cooldown window. For example, a raid awarding 150 Fragments every 30 minutes may be weaker for Race V4 than one awarding 140 Fragments every 8 minutes: at 60 Fragments per attempt, the faster cycle produces 1,080 Fragments per hour before chip costs, compared with 300 from the slower cycle, giving immediate repeat access a measurable advantage.
Entry Rules for Fragment Runs
Most Blox Fruits raid requirements combine a level threshold with a Raid Chip purchase. Some encounters may also impose additional access conditions or stat expectations. Because raid costs can consume part of the expected Fragment reward, players should calculate the net result before starting.
| Requirement | What it affects | Practical check |
|---|---|---|
| Level gate | Whether the raid can be entered | Reach the displayed level before spending a chip |
| Raid Chip | Access cost for a run | Include it in the Fragment cost per clear |
| Combat readiness | Survival against waves and the boss | Test the build in a lower-risk raid first |
| Team or NPC help | Damage output and timing | Confirm party readiness and revive plans |
| Timer | Available time for waves and damage | Prepare skills before entering |
| Cooldown and respawn | Repeat farming speed | Plan a second run only if the reward justifies it |
A raid can be difficult without being unprofitable, but failure changes the calculation completely. If a failed attempt consumes a chip and awards no Fragments, expected value falls sharply. Players should bring healing, suitable gear, and a damage plan that can function even if one teammate is knocked down.
Calculate the Real Cost per Clear
Start with the total Fragments needed for your next milestone. Divide that target by the Fragments received from a successful run, then multiply the result by the average number of attempts required. Finally, add the chip cost for every attempt, including failures.
For example, if a successful clear awards 150 Fragments but you need 3,000, the mathematical target is 20 successes. At a 75% success rate, expect roughly 27 attempts. If each attempt costs one chip, the real expenditure is 27 chips rather than only the 20 represented by the simple calculation.
| Calculation | Simple example | Why it matters |
|---|---|---|
| Fragments needed | 3,000 | Sets the final target |
| Fragments per success | 150 | Determines successful clears required |
| Success rate | 75% | Estimates the additional attempts |
| Chip cost per attempt | 1 | Converts attempts into real resource cost |
| Effective attempts | 27 | Gives a better farming estimate |
This is also why stable team play can be more valuable than chasing difficult content. If a coordinated group raises the success rate, it reduces chip waste and improves the expected net Fragment output. The raid team and carry guide provides additional context for organizing players and planning boss attempts.
Blox Fruits Raid Strategy for Maximum Fragment Farming
The strongest Blox Fruits raid strategy balances speed, safety, and reward timing. The timer means a slow group can fail even when nobody dies, so players should clear waves quickly, avoid unnecessary damage, and save burst skills for the boss’s vulnerable moments.
Prepare Before Spending a Chip
Preparation begins outside the raid. Confirm the level requirement, carry enough currency for the Raid Chip, and bring healing that lasts longer than the current wave. If a skill has a long cooldown, practice the sequence so teammates can cover the period when it is unavailable.
Before committing to a Raid Chip, evaluate the expected Fragment payoff against the chip’s cost and the number of failed attempts you can absorb. Raid bosses often require level-gated teams, coordinated boss-damage roles, and sustained healing through multiple waves, so a low clear rate can turn the listed Fragments into a net loss. Use the displayed boss HP and target time as practical benchmarks: if your team cannot survive the early waves or consistently reach the boss phase, postpone the purchase until the raid strategy is stable.
- Reach the raid’s displayed level gate.
- Buy the required Raid Chip.
- Bring healing and a secondary survival option.
- Assign boss-damage skills and crowd-control skills.
- Agree on the wave-clear order.
- Save the strongest burst for the boss phase.
Preparation does not guarantee a clear, but it reduces preventable mistakes that can erase the Fragment value you expected from a Blox Fruits raid. For example, if your team reaches the boss with too little health, it may lose the damage race before securing the Fragment payout, even after paying the Raid Chip cost. Track the failed-run budget before retrying, and use the displayed boss HP and target time to decide whether the raid is ready for another attempt.
Clear Waves Efficiently
Wave efficiency is more important than flashy combat. Players should prioritize the enemies that can interrupt the group, use crowd control on dangerous clusters, and avoid pulling several groups into the same area. A move that deals excellent boss damage but leaves the team unable to handle the next wave is a poor overall choice.
Timing also matters. If the team spreads damage across the boss while moving inefficiently, the encounter may drag until the timer expires. Better positioning lets melee players maintain contact while ranged attackers remain safe, and clear communication prevents multiple players from pulling the same enemy group.
Burst the Boss Together
The boss is the final test, so the group should save its strongest attacks for the appropriate phase. Simultaneous bursts can remove a health chunk before the enemy reacts, while staggered attacks may waste valuable time. Players should also avoid attacking during a telegraphed mechanic, because interrupting or taking unnecessary damage can delay the entire run.
| Combat phase | Better priority | Common mistake |
|---|---|---|
| Opening waves | Fast, safe enemy removal | Using an ultimate on a weak group |
| Mid-wave pressure | Crowd control and survival | Letting damage builds expire |
| Boss phase | Coordinated burst window | Attacking through a telegraph |
| Final moments | Finish before the timer expires | Chasing a risky extra target |
Community walkthroughs, including Dough King vs All Raid Bosses, can help players observe enemy patterns, but live testing remains necessary because updates and group composition can change how encounters play out. Comparing footage from different Blox Fruits raid teams can reveal whether a Boss’s telegraph, target selection, or reward attempt happened before or after a Fruit or ability change. That distinction matters for Blox Fruits raid boss drops: a strategy that reliably claims Fragments in one group may fail when another team has fewer participants, a different race v4 build, or players using moves such as Dough King’s crowd-control pressure. Treat recorded clears as evidence, then test the same burst timing, survival setup, and reward priorities in your own run rather than assuming every drop route is unchanged.
Comparing Raids by Fragment Yield and Time
A useful comparison combines Fragments per successful clear, average clear time, failure rate, and chip cost. Dividing a successful reward by time alone can be misleading because it ignores failed attempts. The better calculation estimates the expected Fragments per minute across both wins and losses.
| Raid profile | Reward strength | Time efficiency | Reliability | Best use |
|---|---|---|---|---|
| High-yield, slower clear | Excellent | Average | Moderate | Players with a large Fragment gap |
| Moderate-yield, fast clear | Good | Excellent | High | Steady farming and beginner progress |
| Low-yield, difficult clear | Weak | Poor | Low | One-time objectives only |
| High-yield, quick clear | Excellent | Excellent | High | Efficient endgame farming |
| High-yield, long cooldown | Excellent per run | Poor | High | Active players with limited time |
This comparison is more useful than declaring one raid universally best. A player who needs only a few hundred Fragments may get more value from a low-friction raid, while an endgame player closing a 10,000-Fragment gap may accept slower clears if the reward is substantially higher.
Choose by Milestone Instead of Habit
Review your Fragment balance before entering. If the next awakening level is within reach, farm the raid with the best repeatable clear and stop once enough Fragments have accumulated. If Race V4 needs a large total, calculate the remaining cost and select raids with the highest net hourly gain.
Race rolls also change the decision. Saving Fragments for a specific Race V4 attempt can be smarter than rerolling every time a new fragment is earned. Before committing, review the solo raid build guide to compare fragment costs, race progression, and difficulty expectations.
Track Results Instead of Guessing
Keep a simple record of each raid attempt: Fragments received, time spent, chips used, and whether the run succeeded. After several tests, calculate Fragments per hour. This small routine exposes inefficient routes and identifies whether a difficult raid truly has a better payout.
| Metric to record | Useful question | Action created by the result |
|---|---|---|
| Fragments per success | Is the payout competitive? | Compare raids on reward strength |
| Average clear time | Is the fight too slow? | Improve route or use another target |
| Chip usage | How costly are failures? | Practice until consistency improves |
| Fragments per hour | What is the real return? | Select the highest efficient target |
| Milestone progress | Is the resource being used well? | Stop or redirect the farm |
This method keeps comparisons fair when group schedules change, because each raid attempt is evaluated with the same Fragments per hour formula rather than judged from one crowded run. For example, if a raid yields 120 Fragments in 20 minutes, its rate is 360 Fragments per hour; a 90-Fragment run taking 15 minutes matches that result. Include failed attempts and consumed chips in the totals, then compare raids only after collecting multiple samples across the same difficulty and team size.
When to Farm for Awakening, Race V4, or Both
Awakening and Race V4 compete for the same Fragments, so the best raid can differ between two accounts with identical gear. The decisive factor is upgrade priority. If awakening increases your ability to clear raids and reach Race V4, it may produce a larger long-term return than delaying it for immediate race rolls.
Prioritize Awakening When Combat Is the Bottleneck
Choose Awakening when your current build cannot clear the intended raid reliably, your fruit needs a specific awakened form for stronger damage, or the Awakening cost is close enough that completing it will immediately improve farming speed. In that case, the best raid is the one that clears quickly with the materials required for that stage.
Prioritize Race V4 When the Build Is Ready
Race V4 becomes the better priority when your current build already clears content comfortably, your race has weak rolls that reduce damage or utility, or you are close to the required Fragment total. Because Blox Fruits Race V4 can affect a build’s combat performance, a useful reroll may improve every later raid clear.
| Situation | Upgrade priority | Practical reason |
|---|---|---|
| Current fruit cannot handle target enemies | Awakening | More power unlocks harder raids |
| Race rolls reduce damage or utility | Race V4 | Better rolls improve clear consistency |
| Both upgrades are far away | Focus on one | Concentrated progress reduces scattered spending |
| Awakening is nearly complete | Finish Awakening | The remaining cost may be small |
| Race V4 total is within reach | Race V4 | A final push can unlock the upgraded race |
The central rule is to avoid spending the same small balance on both systems at once. Choose the upgrade that removes the larger performance bottleneck, complete it, and then reassess your next farm target. For example, if Awakening is already nearly complete, finish that requirement before investing Fragments in Race V4; the remaining Awakening cost can produce an immediate damage increase for raid boss drops. If your race rolls are weakening attacks or utility instead, prioritize Race V4 because a better roll can improve consistency across repeated raid clears. Avoid splitting a limited Fragment budget between partial progress on each system, since neither upgrade reaches its breakpoint.
Use One Raid to Fund Another
A raid farm can support either path, but the route should fit the destination. Beginner-oriented raids may provide enough fragments for early awakening stages, while stronger raids may be needed for Race V4’s larger total. The general raid guide can help with entry procedures, chip purchases, and general run preparation.
A practical sequence looks like this: first, pick a destination such as Race V4 awakening or a specific raid upgrade, then match the farm to that goal. For example, target an easier raid such as the Flame raid while building early Fragments, but move to stronger bosses when their expected Fragment output and drop rate justify the higher execution risk. Check each raid’s entry requirements, boss timing, and Fragment rewards before committing, since a difficult clear may still be less efficient than several successful beginner-level runs. This prevents Blox Fruits raid boss drops from being treated as a random accumulation and keeps every clear aligned with a defined awakening milestone.
-
Identify the next single upgrade milestone.
-
Choose the raid with the best expected Fragment gain for your skill level.
-
Learn its wave order and boss timing.
-
Farm until the milestone is complete.
-
Save any remaining Fragments for the second upgrade path.
This sequence turns raid farming into a repeatable progression loop: each successful clear contributes Fragments toward one selected upgrade milestone, then any surplus can be redirected toward the second path. For example, a player targeting Race V4 might compare the expected Fragment yield of Flame with that of a stronger raid before committing to the higher-risk clear. This makes Blox Fruits raid boss drops more valuable because progress is measured against a concrete awakening target rather than an abstract currency total, while remaining Fragments preserve momentum toward the next Blox Fruits raid upgrade.
Common Mistakes That Reduce Raid Value
Most inefficient farming comes from ignoring access cost, clear time, or the purpose of the Fragments. Players often choose a raid because it is currently available rather than because it produces the best return, then spend chips on repeated failures without improving their approach.
Chasing a Rare Accessory from a Raid
Raid bosses do not normally drop accessories, so treating them like accessory farming targets can create false expectations. Their dependable contribution is the Fragment payout and access to progression. Use regular boss routes when accessories are the priority and reserve raid chips for Fragment-based goals.
Ignoring the Chip in the Formula
A reward looks generous until chip costs are included. Failed attempts can double or triple the effective cost, especially at low levels where a player may not know the boss pattern. The useful comparison is net Fragments per hour after all chip purchases, not the number shown in the victory screen.
Farming Without a Milestone
Unlimited farming can become inefficient because Fragment balances eventually become large enough to change priorities. Set a finish line for every session, such as completing one Awakening stage or reaching the next Race V4 total. This also provides a natural stopping point when an upgrade is more valuable than another low-value clear.
Rerolling Race Rolls Too Early
Early Race V4 rerolls can consume resources before the character has a stable combat foundation. If Awakening will materially improve damage and survivability, complete that step first when practical. Then evaluate the race with a clearer picture of the build it must support.
Frequently Asked Questions
What do Blox Fruits raid boss drops usually give?
Raid bosses primarily award Fragments rather than accessories. These Fragments contribute toward fruit Awakening, race rerolls, and Race V4 progression. Exact rewards can change with updates, so check the current raid panel after clearing and use community reports as a secondary reference when a new patch is active.
Which raid is best for farming Blox Fruits Fragments?
The most efficient raid depends on expected Fragment yield, clear time, failure rate, chip cost, and repeat access. A fast, reliable raid can beat a harder target for steady farming, while a high-yield raid may be better when you need a large total. Track several runs and compare net Fragments per hour.
Do I need a team for Blox Fruits raids?
Some raids can be attempted solo with a strong build, while others are designed around coordinated groups. Team play usually improves consistency because players can cover one another during difficult waves and synchronize boss bursts. Check the raid strategy and entry details before relying on a solo clear.
Should I save Blox Fruits fragments for Awakening or Race V4?
Save for Awakening when your current power is the main obstacle to faster raids. Prioritize Race V4 when your combat build is stable but its race rolls are weak. If both are distant, focus on one until you reach a milestone, because splitting a small balance usually slows overall progress.
Can Blox Fruits Race V4 use the same Fragments as Awakening?
Yes, Fragments are shared across these progression paths, so spending on one reduces the balance available for the other. The best order depends on your current build: improve Awakening first when it unlocks stronger clears, and pursue Race V4 first when race quality is already your clearest combat bottleneck.
Blox Fruits raid boss drops are best evaluated as a progression system, not a single reward number. Compare net Fragment yield, time, chip expense, and your next upgrade goal; then turn each clear into a deliberate step toward Awakening or Race V4 instead of farming without a finish line.